Vietnam’s public healthcare system offers affordable medical services through a structured network, and for expatriates, it’s accessible via the Vietnam Social Security (VSS) system. This article explains how the system works, how to register with VSS as a working expat, and what to expect when using public healthcare, including copayments and travel scenarios.
History of Public Healthcare in Vietnam
The public healthcare system in Vietnam started under French colonial rule in the mid-20th century, serving mostly the elite. After independence in 1945, the socialist government in North Vietnam introduced free healthcare, expanding it nationwide post-reunification in 1975. The Đổi Mới reforms of 1986 introduced user fees and social health insurance, alongside private providers.
The Structure of Public Healthcare in Vietnam
Managed by the Ministry of Health, the system operates on four levels: national, provincial, district, and commune. It includes over 1,100 public hospitals and thousands of commune health stations, forming 86% of Vietnam’s hospital network. Funding comes from government subsidies and mandatory VSS contributions from formal-sector employees. Subsidized care covers groups like the poor, ethnic minorities, children under six, and seniors over 80. Services range from basic checkups at commune stations to specialized care at national hospitals like Bach Mai in Hanoi, though overcrowding, outdated equipment, and rural staffing shortages are common.
How to Register with VSS as a Working Expat
As a working expat, registering with VSS is tied to your employment and mandatory if you have a work permit and a contract of at least one year. Here’s the process:
Employer Registration: Your employer will handle this process (usually online) by submitting all information necessary including Work Permit.
Contributions: Your employer pays 17.5% of your salary, and you contribute 10.5% (deducted from your pay), with 1.5% for health insurance, capped at 20 times the minimum wage (~36 million VND/month, ~$1,500 USD). This breakdown might be subject to change, ask your company for the details applied to your own compensation.
Get Your Insurance Card: VSS assigns a 10-digit social security number and issues a health insurance card (physical or via the VssID app).
Choose a Facility: Your employer picks a public medical facility near your work or home as your registered healthcare provider for routine care.
Activation: The card is active immediately, usable at your registered facility or other public hospitals with conditions.
Your employer handles most paperwork in Vietnamese, and if you change jobs, your new employer updates your VSS record.
Accessing Public Healthcare as an Expat
Access Vietnam Public Healthcare with VSS Insurance
Once registered with VSS, here’s how you use the system:
Registered Facility: You start at your chosen public facility for routine care, paying little to no out-of-pocket costs for covered services.
Other Public Hospitals in Vietnam: You can visit other public hospitals, but bear in mind the following.
With Referral: Full coverage requires a referral from your registered facility for higher-tier care (e.g., provincial or national hospitals).
Without Referral: For non-emergencies, you’ll pay a copay—40% at the same/lower tier, 60% at a higher tier.
Emergencies: Go to any public hospital without a referral; coverage applies fully if documented (notify VSS/employer within 48 hours).
Access Vietnam Public Healthcare without VSS Insurance
If you’re not working in Vietnam (no social security number), you can still use public hospitals but pay full, unsubsidized rates.
Copayments and Reimbursement
Copays: If you skip the referral process for non-emergencies at a different hospital, you’ll pay 40–60% of the cost. These copays aren’t reimbursable, as they’re seen as your choice.
Reimbursable Costs: If you pay out-of-pocket for covered services (e.g., due to hospital errors or emergencies not processed correctly), you can submit receipts, medical records, and a claim to your employer or VSS within 6 months. Approval depends on VSS review, but it’s not common for standard copays.
If you’re away from your registered facility
Emergencies: Any public hospital accepts you with full coverage; submit documents later.
Non-Emergencies: At another public hospital, expect a 40–60% copay without a referral, non-reimbursable. Carry your VSS card or VssID app to reduce costs.
Temporary Transfer: For extended stays (e.g., work assignments), your employer can request VSS to switch your registered facility temporarily.
Private Option: Pay full rates at public or private hospitals if you prefer avoiding copays/paperwork. Private Hospitals and Public Scheme Private hospitals in cities like Hanoi and Ho Chi Minh City offer better care and English-speaking staff. Some accept VSS insurance if contracted with VSS, but most cater to private insurance or cash patients due to low public reimbursement rates.
Challenges
Urban hospitals are overcrowded (up to 200% capacity), rural ones lack resources, and extra costs for uncovered services can arise. Locals may give “appreciation envelopes” to doctors, but this rarely applies to foreigners.
Language is without a doubt a hurdle—most staff speak only Vietnamese, with limited English in urban areas and none in rural ones. Bring a translator or use an app.
Conclusion
Working expats can register with VSS through their employer to access subsidized public healthcare at a designated facility, with referrals unlocking full coverage at other hospitals and emergencies covered anywhere. Copays apply without referrals and aren’t reimbursable, while travel may require planning or private options. However, in practice, most expats working in Vietnam opt for private healthcare for more comfortable access—think English-speaking staff and shorter wait times. Prices are significantly higher, so many secure private medical insurance to cover these costs, bypassing the public system’s challenges like overcrowding and language barriers.
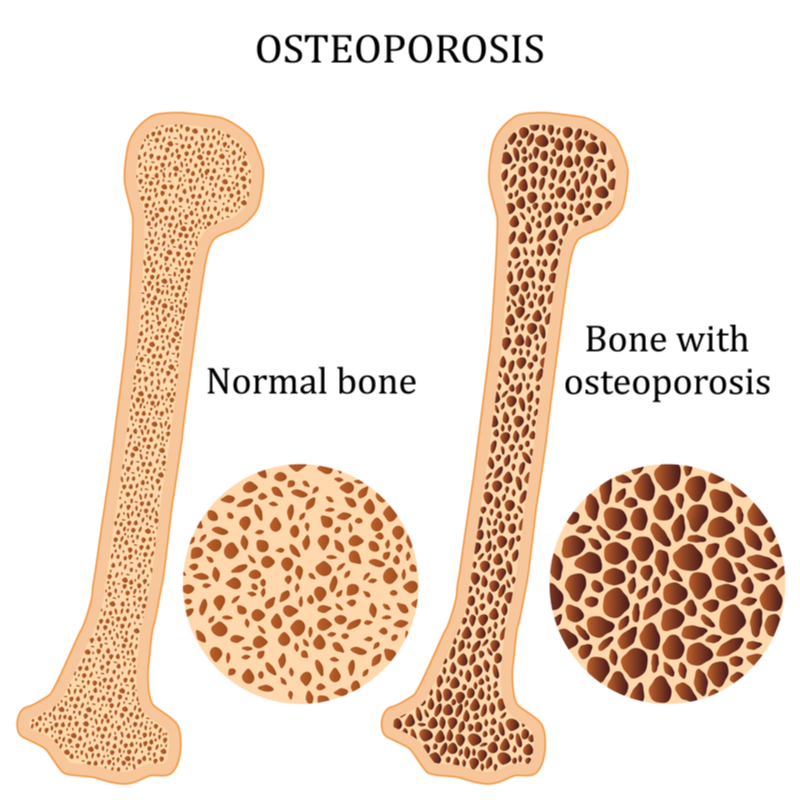
The bones in our body consist of living tissues that continuously develop and strengthen from the moment of birth right up to adulthood. In fact, our bones are most dense in our 20’s – ideally called peak bone mass. As we age, some of our bone cells tend to dissolve bone matrix (also known as resorption), while new bone cells deposit osteoid (formation).
And when a person suffers from osteoporosis, bone loss outpaces new bone growth, resulting in bones that are porous, brittle and prone to fractures. For runners, it begs the question – is joint pain experienced after running a sign of osteoporosis? Read on to find out.
1.Osteoporosis vs Osteoarthritis
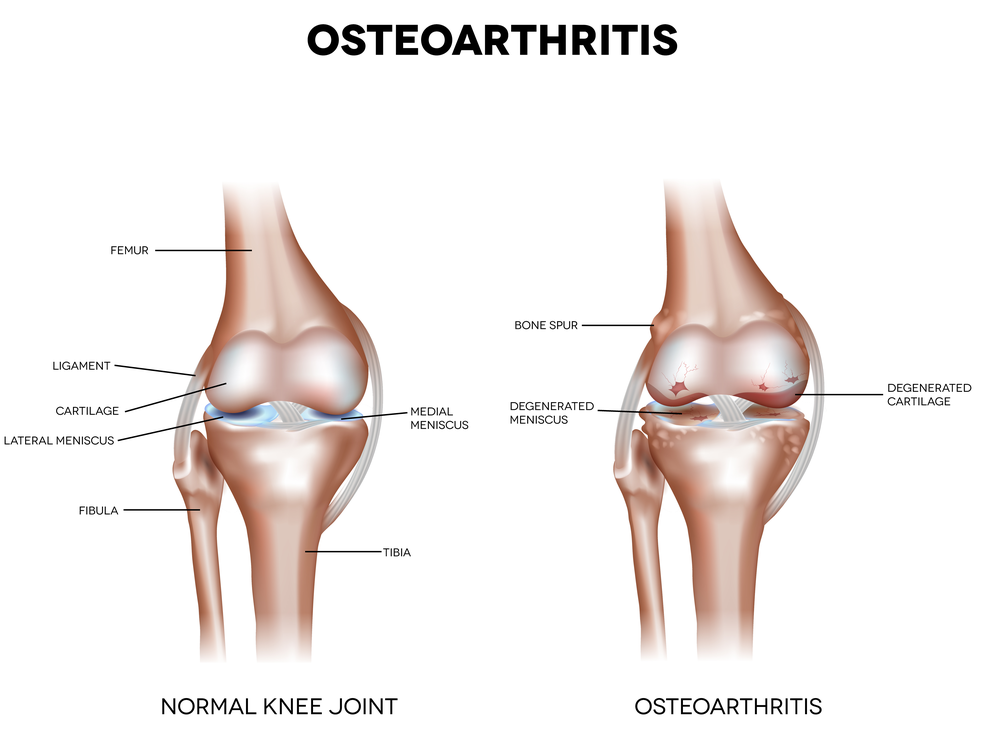
Post-run joint pain is not a sign of osteoporosis, period. This is because osteoporosis is a bone disease that affects the health of your bones and can lead to fractures. Osteoporosis causes no pain or symptoms, which is why it is also known as the “silent thief”. In stark contrast, osteoarthritis, which is also the most common form of arthritis, is a degenerative disease that affects the joints directly by thinning or destroying the smooth cartilage that covers bone ends or changes the bone which underlies the joint cartilage.
Osteoarthritis affects each joint individually, and can cause pain through joint overuse, prolonged immobility and painful bone growth in joints, thus making it more likely to cause joint pain after running as compared to osteoporosis. Other risk factors that make an individual susceptible to osteoarthritis include genetics, lack of physical activity and being overweight.
2. Knee Injuries, The Bane of all Runners
To understand better the occurrence of running injuries that affects the joints, it is important to know that running is able to strengthen bones and muscles, as well as cartilages, which cushions joints. And strong muscles, in turn, are also able to support joints, thus preventing injury. However, injuries can occur, primarily to the knees, hip, ankles and feet as result of poor running form or muscle imbalances.
Patellofemoral pain, or more commonly known as “runner’s knee”, is a condition that causes discomfort behind the kneecap (also known as the patella) as a result of repetitive contact between the patella and the femur (which is the thigh bone). On the other hand, patellar tendinopathy causes an inflammation of the tendon which runs from the kneecap to the top of the tibia. This results in significant pain at the bottom of the patella, especially when running downhill. Another knee injury that can occur is a torn meniscus. This tear can occur as a result of thinning of the cartilages on the inside and outside of the knee (which act as bumpers between the femur and tibia), increasing your susceptibility to further deterioration as you age.
3. Recognising the Causes of Knee Injuries
One of the primary causes of knee injuries is flaws in your running form. These flaws include hip adduction and over-striding when running. Hip adduction occurs as a result of an individual’s abductor and external muscles being weak, causing excessive adduction and internal rotation when running. Over-striding, contrastingly, involves a runner’s feet making contact with the ground too far ahead of their centre of gravity, increasing shock and decreasing running performance.
Another cause of knee injuries is muscle imbalance. It is related to biomechanics, since muscle imbalance can cause poor biomechanics, and vice versa. Strong knees require two oppositional forces – strong quadriceps to straighten the knee and flex the foot forward, and strong hamstrings to bend the knee and pull the leg backward. If these two muscles do not work in tandem with each other, it is guaranteed to put your knees at risk of injury. Other reported causes of knee injuries are genetics and gender, although there has not been substantial evidence to back both as viable injury causes
4. Identifying Ways to Better Protect Your Joints
There are a number of ways in which an individual can prevent joint pain after running. The first would be to shorten running strides. Increasing stride rate (with shorter running strides) by a measly 5-10 percent can significantly reduce the load on your patellofemoral joints by almost 20 percent. Aim for 160-190 steps per minute, and avoid changing the way your foot hits the ground, as it can directly impact the load on your Achilles tendon. The second thing to do would be to evaluate your running form. A physiotherapist can identify if you suffer from hip adduction or overstriding, and provide you with the right instructions on how to correct your form. For example, a physiotherapist may recommend gait-retraining sessions in order to strengthen the muscles and joints in your lower body.
Additionally, switching up your running locations may be able to prevent joint pain after running. This is because each running location enables a runner to change the surface, route and tempo of each run, thus allowing for a change in how loads are placed on joints. Alternatively, some reported cases of joint pain were understood to be caused by excessive weight, which quite literally puts an increased load on our knees. Adopting a strict health and fitness regimen that focuses on a balanced diet for weight loss, as well as a workout routine that aims to burn calories even after you finish exercising will help you to shed extra weight.
Individuals with osteoporosis should focus on weight-bearing exercises, while individuals with arthritis should focus on keeping joints mobile through a customised approach to exercise and movement. Before doing so, it is best to seek consultation with a physiotherapist, who is best qualified to plan out a programme to manage specific conditions.
Osteoporosis should not ruin your pleasurable stay in Thailand. Luma Health, one of the healthcare specialists, can take care of it for you. Luma offers different plans that also cover osteoporosis. We offer health insurance plans that match your needs. Our partnership with reputable global insurers gives us the flexibility to offer a whole range of health solutions to our members including special privileges. If you suddenly suffer from osteoporosis while staying in the country, Luma works with medical emergency teams to support you.
Get a quote now! Complete the online form below. Our team will contact you within 24 hours.
Scuba diving is an adventure that demands respect for both the beauty and the potential dangers of the underwater world. With 45 years of experience, our colleague, Michael Loefler, shares his personal 10 Rules When Scuba Diving offering valuable insights for both novice and experienced divers. His firsthand account highlights the importance of preparedness and safety in this exhilarating activity.
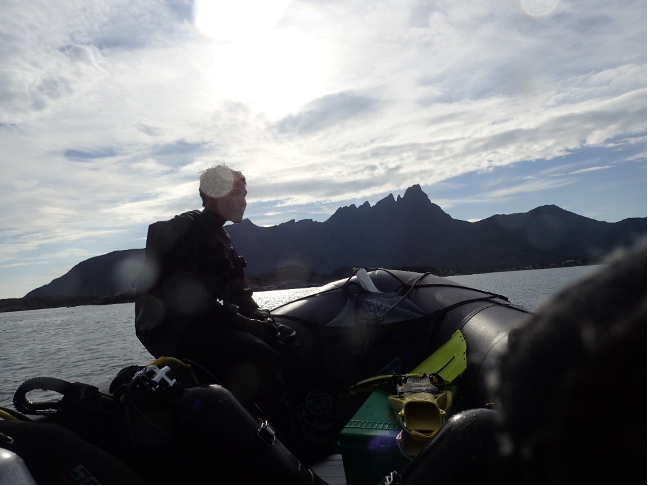
I have been diving for 45 years. My son started at the age of 10 and he is now about to study marine biology to live a passion, that gripped his spirit from the first time he started breathing underwater. We are a family of sea dogs. The ocean, lakes and even rivers hold an endless reservoir of life, phenomena, and mysteries to fill centuries of exploration and adventure. All that is necessary is to put the head underwater and to open eyes and mind.
But by doing so we must be aware -at every second of this journey- that water is not only the essence of life, but also an element which we cannot naturally survive in. The journey into this element needs to be well prepared and equipped. The mind needs to be calibrated for the unbreakable natural laws, much the same way. The adventurous human must understand that, under water, we are at the bottom of the food chain. Like with high altitude flights, we are intruders in a realm forbidden to our anatomy. Only our technological tricks and inventions give us the key to a world where we float, where we defy gravity and where we have (unfortunately) only the grace of a half-chewed Marshmallow.
If you are a frequent and experienced diver or a Tech Diver, everything below is your daily mantra. But if your diving is recreational, opportunistic, and occasional, if you are a diver changing location and dive shops frequently; the following is good to remember.
Rule 1: Equipment selection and maintenance
We always use our own equipment, except for weights and tanks. As such we know it fits, we know it works and we know every function, button, valve, or hose in total darkness.
If you do not carry along key equipment, like the regulator or the computer, you must rely on the dive shop. A good look around the equipment room can reveal a lot.
Make sure the Buoyancy Control Device (BCD)¹ really fits your size, that the Regulator² and the Octopus³ do not wheeze and that all O-Rings⁴ are in. A common sense check will help, and do not be shy to ask questions or to walk out.
Rule 2: Dive planning carefully
There can be currents unrelated to tides which you do not see from the surface. Some currents like in deep alpine lakes, along steep drops or wrecks, can go down into uncharted territory. And they can take you with them. Wrecks and conditions at steep walls, cave entries or freshwater intakes should be included into the dive plan.
And of course, the best protection is not to dive alone. It is like the crossing of a mountain slope in the face of danger of an avalanche breaking free.
Part of the planning includes the knowledge of emergency phone numbers, such as coast guards, rescue operators, deco chambers⁵, air-evac or local hospitals. In most Asian or developing countries destinations, helicopter airlifts are simply not available. But then again, most dive companies operate within a few hours from shore. For live onboards it is worth asking for emergency equipment such as certified oxygen tanks or cells, mobile deco chambers, and satellite phones.
During a 2-week live onboard in the Solomon Islands one of the divers had an undetected heart condition. Although she was a young and healthy woman and stayed well inside the NDL (No Deco Limit)⁶ time limits, the blood flow through the heart was irregular and not all blood was channeled through the lungs to release the nitrogen. She survived – as far as I know – without lasting damage, but the fear and the pain she felt will remain as a lifelong memory.
Another case was the heart attack of a firemen (a 40 year old big rock of a man) on a 40 m dive in the coral gardens of the Red Sea, between Akaba and the Saudi border. He was lucky that it was a shore dive and that we had a crew onshore that reacted with lightning speed when we brought him up.
So, having local knowledge and an emergency plan can save you.
Part of your preparation should be to make sure your health insurance covers your diving endeavors. Reading the small prints or asking a reliable insurance agent or broker can save you a lot of trouble and cost.
I would always include cover for evacuation (air evac), repatriation and rescue. Trust me, you do not want to pay for a helicopter rescue and a 1 week stay in a decompression chamber.
Rule 3: Health
NEVER EVER dive when you are not healthy. You will be a threat to yourself AND OTHERS.
I have seen divers panic. I have seen them vomit in their regulators, I have seen divers overwhelmed by their migraine, I have seen divers unable to ascend because of air bubbles under their fillings (I was told it really hurts when the pressure builds up while trying to get back to the surface. Especially the last 10 m are very “memorable”).
My son did his Rescue Diver and his CPR training⁷ when he was barely 14. Not to save anyone at first, but to be aware of what can go wrong. And this is a lot. With a cold and a blocked nose, you can blow your ear drums on the way down, but then you can get back to the surface and suffer there, in pain and disoriented. You spoil a dive for your buddy, but besides your own lasting damage, the impact is limited, unless you dive under ice or in confined space.
I did that with the police divers to recover a body when I was just out of the army. We were connected to each other under the ice and the poor guy, whose ear drums blew because he did not want to excuse himself with flu, paid dearly for his team spirit.
Rule 4: Buddy Buddy!
As you are alone in a habitat that is clearly not ours and where you need to take your very limited air supply along to survive between 1 and 45 minutes on borrowed time, the Octopus³ of your buddy can save your life.
He is the one bringing you back to the surface when you faint, collapse, vomit, or panic. He helps you when you get entangled in a net or get stuck is a giant clam (yes, it can happen). He is your guardian when you face death because you hit a stone fish by accident. He is the pair of eyes in the back of your head when you ascend from the deep in murky and shark infested waters (happened to me at Hammerhead Shark Point in Boracay and in Papua New Guinea). Your buddy is the only one to see the signs of Nitrogen Narcosis, when you start to hallucinate under water.
I dive only with my son now. In the beginning he was diving with me. Now we dive as equals and we watch each other’s back every breath along the way. It can be an incredible bonding experience. Works for fathers or mothers with sons or daughters or husbands and wives You name it. If you ever dive with your boss through a narrow long tunnel (like the volcanic tubes in the Solomon Islands), he (or she, of course) will never see you the same way as before. But really. It matters.
Rule 5: Stay within No Deco Limits (NDL)
No kidding. As a recreational diver, use a computer and STAY WITHIN YOUR NDL⁶. Deco or Tech Dives are for pros or trained and fit divers, only. Each Tech or Deco or Helium or Trimix dive is to be making god an offer to bring you home. Because you cannot just ascend for a glass of wine and freshly breaded Abalone, like what I enjoyed after diving in the Kelp forests between Santa Cruz Island and Santa Barbara. Below a certain depth, all you have is your buddy, your equipment, your backups, and your own brains. As a conventional recreational and occasional diver these areas of the ocean are out of limits.
As an additional risk you must face the risk of “The Bends”. This is another law of physics that tells us to accept our limitations as children of the land.
We are no amphibians or Atlanteans, after all. In simple terms: when descending, nitrogen, (which makes 78% of our surface gas mixture that we breathe) dissolves into the blood steam and, when ascending, the liquidized nitrogen has to be gradually released back into the exhaled air. Coming up too fast means that nitrogen is trapped inside the bloodstream and is released (bubbling out) within, as outside pressure reduces. Painful! And dangerous because it can lead to paralysis and death. Only quick fix is to get the patient into a pressure chamber. As I said before, these devices are hardly available on time (unless you are a pro diver on an oil rig).
Rule 6: Aquatic Wildlife
Treat every sea creature you encounter as superior to you in their element. Because they are. And they all have their own defense system.
This can be to keep distance and flee or it is to attack, like a trigger fish once you enter his funnel shaped territory or a moray eel, when you wave your hand before the entrance to their cave.
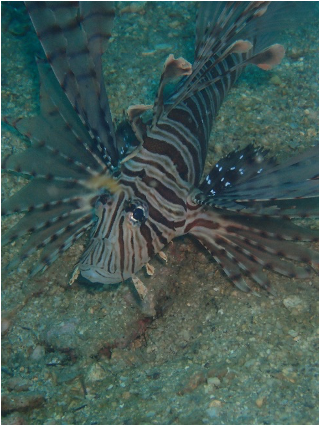
I have seen a joker trying to take selfies with lionfish, only to see his blood ooze green out of his glove.
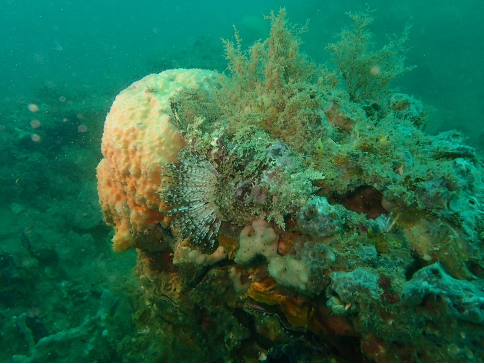
Sharks are usually not a problem as long as you end on the bottom, but an ascent in murky water alone, and with a very limited field of vision, releasing air bubbles constantly may attract the curiosity of a tiger or bull shark. I have experienced this in the Florida Keys. An experience not easy forgotten. But besides man eaters and sea monsters, making contact with a sea urchin and the nasty feeling of the spikes under your skin can also spoil the day. Touching a stone or scorpion fish (that is literally invisible to the untrained eye, see below picture) is dangerous.
Anaphylactic shocks do not only happen on land. Contact of bare skin with a box jelly fish or Portuguese Man O War can kill, if the diver has a weak heart. The pain is excruciating, and the scars will stay as a lifelong reminder. This is particularly tricky when jumping in from a boat.
Rule 7: Night dives
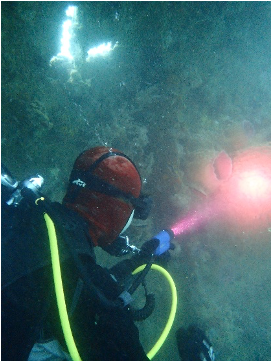
Night dives are unbeatable experiences when executed as part of an experienced and well-prepared team. Location knowledge is pivotal for safety.
I found one of the biggest risks is depth control. In the Solomon Islands I was fascinated by the mating play and the color changes of two 60cm long squids. And I followed them down a steep coral wall in crystal clear water. When I checked, my buddy was 25m above, and my curiosity had brought me down to 45m. One of the most fascinating experiences I encountered, was to sit on the bottom in 20m at night (new moon, meaning pitch black) and to turn off the lights. Wait 7min for regaining night vision and then start the ascent following your bubbles. How do you see them? They trigger a bioluminescent reaction of the surrounding plankton. And this impression is one you will never forget. But doing this does require excellent preparation, a buddy and real experience.
Rule 8: Energy Management
Swimming against the drift makes a short, exhausting, joyless and dangerous dive. The burn rate of oxygen sucks your tank empty, it will increase the risk of cramps and you hear yourself sucking air through the regulator like an old steam engine.
A drift dive, on the other hand and in good visibility, is a serene experience and you can feel like in an IMax theater letting the bounty of pristine coral reefs pass by in 3D (if you are lucky).
But there are times where we have no choice. If we must make it back to the boat, if we need to backtrack to find a lost item, if we need to reach someone in need of help. No choice.
My son and I have developed a technique. Archaic as we are, we both carry real old fashioned dive knives. We go as deep to the sand floor as possible, stick the knife in the sand and pause. Like going up the stairs of a tall building. We recover our breath, relax the calves, and move on. If the bottom is not sand but reef or stone, we hold on where we find bare rock. But these are emergency procedures which a good dive planning can avoid most of the time.
Rule 9: Confined spaces caves and wrecks
Did you ever have an MRI? Did you like it? If your heart beats quicken when being moved into the tube and you feel your chest to be compressed, if you get the sudden and certain feeling of not making it out alive; do not dive volcanic tubes, long passages through wrecks or -God forbid-caves.
Panic can strike suddenly and with a vengeance. One wrong thought being to be buried alive. One wrong noise in your breathing apparatus and hell is coming your way.
Before you try confined spaces, I would suggest to try in a safe environment first. When panic strikes underwater, you endanger your whole team, not only yourself.
Last but not least.
Rule 10: After the dive do relax, hydrate, do neither smoke nor drink and stay warm.
This is no rocket science, but it should be mentioned. After all you just returned from a journey to a realm where everything is possible…
Terms used:
Buoyancy Control Device (BCD)¹: Diving equipment to achieve neutral buoyancy underwater and surface flotation, using an inflatable air bladder.
Regulator²: Pressure regulator controlling gas breathing pressure when ascending and descending during diving.
Octopus³: Spare demand valve for emergency use for the diver’s buddy.
O-Ring⁴: Rubber seal preventing leaks in dive gear.
Deco chamber⁵: Decompression chamber is a sealed facility holding high pressure, to allow divers to complete their decompression process.
NDL (Non Deco Limit)⁶: Time limit for a diver to spend underwater, without having to make any decompression stop when resurfacing.
CPR training⁷: Cardiopulmonary resuscitation is an emergency lifesaving manual procedure done when the heart stops beating.